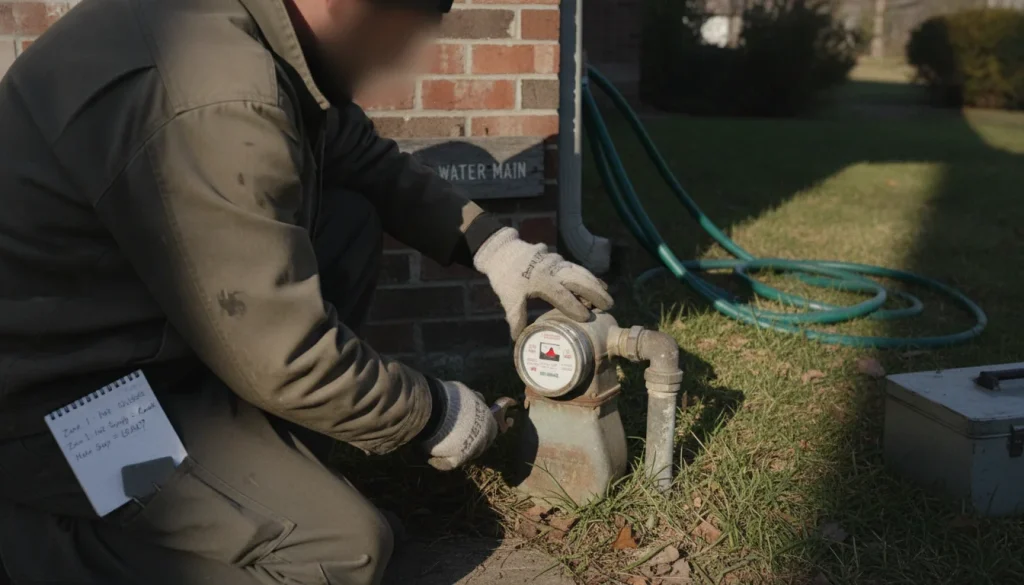
If you need a straightforward method for how to find a water leak in your house, start with the water meter and work outward. A water leak is any unwanted flow from supply or drain lines, and a calm, stepwise approach helps you confirm a leak, stop immediate damage, and narrow the source without opening up walls. In Hillsboro, older supply lines, irrigation systems, and seasonal pressure swings can all contribute to hidden leaks, so a systematic check saves time and protects finishes. Hillsboro Plumber applies the same sequence below on service calls across the city to pinpoint issues accurately.
Key Takeaways
- Confirm safely first: Use the water meter test with all fixtures off.
- Control risk: Shut water and power to wet areas before investigating.
- Isolate zones: Close valves, time tests, and compare results to separate supply from drain problems.
- Use the right tools: Start with simple gear; consider professional instruments when signs are vague.
- Prevent recurrences: Maintain components, manage pressure, and add smart monitoring.
Table of Contents
- The Fast Answer: Confirm a Leak Safely and Stop the Damage
- Spot the Clues: Interior and Exterior Signs of a Water Leak
- Tools That Help: Simple Gear vs. Pro Instruments
- Step-by-Step Hunt: Track the Source Without Tearing Walls
- Hidden and Hard-to-Reach Leaks: Walls, Ceilings, Slabs, and Crawlspaces
- Found It—Now What? Mitigation, Drying, and When to Call a Pro
- Prevent the Next Leak: Maintenance, Pressure Control, and Smart Monitoring
1. The Fast Answer: Confirm a Leak Safely and Stop the Damage
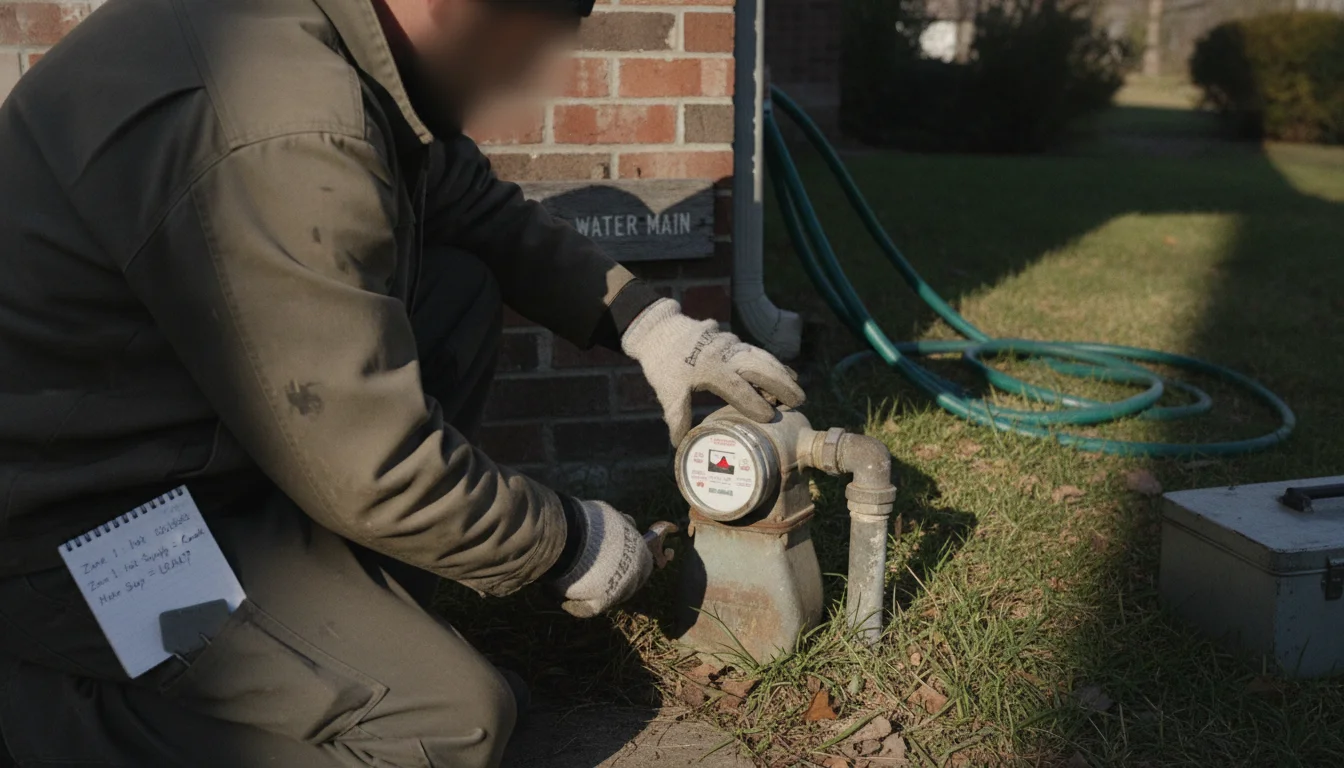
When speed matters, begin with the meter test. Your water meter tracks usage; with all taps, fixtures, and water-using appliances off, watch the small leak indicator (often a triangle or spinning dial). If it moves while everything is off, you likely have a hidden supply-side leak.
Next, limit the damage. Locate the main shutoff—commonly where water enters the home such as in a basement, garage, or at a curb box—and close it. For a lever valve, turn it a quarter turn until it is perpendicular to the pipe. If water is near outlets or the electrical panel, shut power to the affected circuit at the breaker first; water and live electricity must stay separated for safety.
After turning water off, wait ten minutes and recheck the meter. If the indicator stops, the issue is likely on the house-side piping. If it still moves, the problem may be on the service line between the meter and your structure. Document what you observe with photos and brief notes—this log helps a licensed plumber plan repairs efficiently.
If you must keep water available for basic sanitation, crack the main valve partially and monitor closely. Keep towels, a bucket, and a mop at the ready; place trays under active drips and move rugs or furniture from damp areas. These simple controls reduce spread while you locate the source.
2. Spot the Clues: Interior and Exterior Signs of a Water Leak
Leaks leave patterns you can read. Indoors, begin in rooms with plumbing. In bathrooms, check for loose or failing caulk, soft flooring near the toilet, and staining beneath sinks. Run the shower and observe the ceiling below for fresh spotting. In kitchens, open the sink base and inspect shutoff valves, braided supplies, traps, and the garbage disposal body; a quick wipe with a dry towel makes reappearing moisture easier to see. In the laundry, check washer hoses, the drain hose, and clamps—brittle lines or rust halos often indicate weeping joints.
Basements often tell clear stories. Look for damp lines at walls, white chalky deposits called efflorescence, and rust trails at joints. If a sump pit cycles during a dry spell, that can hint at a nearby plumbing leak rather than groundwater. In attics, note darkened sheathing or heavy, matted insulation; remember that a roof leak can mimic a pipe leak, so track whether stains correspond to storms or occur on clear days.
Outside, walk the yard along the probable water service route. A persistently green patch during a dry period or soggy soil near the foundation can point to a buried line issue. Inspect irrigation valves and backflow assemblies for hissing and damp boxes. Watch the curb or gutter for steady flow that doesn’t subside. If the meter shows flow with the sprinklers off, suspect an irrigation line leak.
At slab edges and foundations, hairline cracks can be normal, but musty, damp zones or unexplained warm spots on finished floors often indicate a hot-water line under the slab. Also note musty odors, bubbling paint, or peeling baseboards—signs that help you narrow the search area before any opening.
3. Tools That Help: Simple Gear vs. Pro Instruments
You can accomplish a lot with basic tools. A bright flashlight reveals sheen on pipes and fittings in dim spaces. Dry towels are great for weep checks—place one under a suspect joint and revisit in an hour. Dye tabs or a few drops of food coloring can test a toilet: color the tank water, wait ten minutes without flushing, and look for color in the bowl to confirm a flapper leak. A basic moisture meter helps compare dampness at a suspect spot versus a known-dry area so you can map gradients.
Use a non-contact voltage tester whenever water is near wiring to avoid surprises. A small mirror helps check the backs of traps and valves. Painter’s tape with time-stamped notes lets you tag damp zones and track trends. These simple tools keep the process organized and safe.
Professionals add specialized methods when needed. Acoustic listening uses sensitive microphones to hear leak noise through walls and floors. Thermal imaging highlights temperature patterns—cool or warm bands can outline active lines and saturated materials. Tracer gas testing fills a line with a light, safe gas mixture; detectors find escape points with precision. These approaches reduce guesswork and the size of any necessary opening.
If clues are faint or access is risky, consider scheduling Leak Detection Services so a licensed plumber can pair instruments with pressure tests and confirm the scope before any repairs. That approach can save time, materials, and stress—especially in finished spaces common around Hillsboro.
4. Step-by-Step Hunt: Track the Source Without Tearing Walls
Work from the obvious to the hidden. Start with fixtures and appliances. Toilets commonly cause silent leaks. Add dye to the tank and wait; also listen for fill-valve cycling when no one is using water, and feel around the base for dampness. At sinks and showers, run water and watch traps, supply lines, and shutoffs beneath; a dry paper towel turns dark quickly when it picks up moisture.
Check dishwashers and refrigerator icemaker lines. Slide appliances forward only if safe, and look for kinks, corrosion, or dark “dust lines” tracing moisture paths. Inspect the water heater for rust streaks, a damp pan, or a slow drip at the temperature and pressure relief (TPR) valve—each is a warning sign. If hot water is always available while the meter spins with fixtures off, a hot-side leak is likely. If you need help with failed parts or diagnosis, consider Water Heater Repair – Hillsboro Plumber or Anode Rod Replacement Water Heater – Hillsboro Plumber.
Next, separate supply from drain problems. Supply leaks occur even when fixtures are off; drain leaks appear only when water flows. For a simple timed test, fill a sink or tub and let it sit with the stopper engaged for about ten minutes. If the meter remains steady during the hold but dampness appears only when you release the drain, focus on the trap, tailpiece, or waste line. If dampness increases during the hold, the overflow or supply is suspect.
Use shutoff valves to narrow the zone. Close the cold supply to a bathroom group and watch the meter. If the indicator stops, the leak likely lives within that zone. Reopen and close the hot supply to compare. Repeat for other fixture groups. This “valve isolation” method pinpoints rooms or branches without cutting into multiple areas.
5. Hidden and Hard-to-Reach Leaks: Walls, Ceilings, Slabs, and Crawlspaces
Hidden leaks require slow, careful reading of patterns. Sharp-edged stains usually mark old, dried events; soft, expanding stains suggest active moisture. Musty odors come from damp materials with limited airflow. Warped trim or bubbling paint often shows moisture wicking up from below. Use your moisture meter to map relative dampness, and mark the wettest point as a reference—it may not be the exact source, but it helps guide targeted access if needed.
Temperature patterns add insight. Run only hot water at a nearby fixture for a few minutes, then scan adjacent walls and floors. A warmer lane can outline the hot supply route. For ceilings, note joist direction because water often follows framing and can drip far from the origin. Check directly above a stain and one bay over to verify.
Slab and service-line leaks offer special clues. An unexpected warm patch on tile or engineered flooring can indicate a hot-water line leak under a slab—bare feet make good sensors. If the meter runs with all interior valves closed, suspect the service line between the meter and the house. Walk the yard along the service path, looking for soft soil, greener grass, or a steady trickle at the curb. In crawlspaces around Hillsboro’s older homes, look for dripping insulation tips, pooled water on vapor barriers, and mineral crust at copper joints.
When signs point to a buried or slab leak, call a licensed plumber. Techniques such as acoustic listening, thermal imaging, and tracer gas help target the problem through hard surfaces, minimizing the size of the opening and protecting finishes.
6. Found It—Now What? Mitigation, Drying, and When to Call a Pro
Once you identify the source, act to limit losses. Shut the nearest fixture valve or the main. For a small pinhole in copper, a temporary pipe repair clamp can stabilize the situation while you plan a permanent fix. Manage active drips with towels or trays, and move belongings off wet flooring. Use fans and open windows to encourage drying, and keep indoor humidity down to discourage mold. Document conditions with photos and short notes—handy for insurance claims and planning.
If drywall is wet, consider small inspection holes at the base to relieve trapped water. Cut power to any wet outlet or switch. Avoid running the furnace or central air if ducts or returns are wet, as that can spread moisture. For standing water, a wet/dry vacuum can help. Discard carpet pad that remains damp or smells musty. Swift action in the first day is critical for effective drying.
Call a licensed plumber when leaks are inside walls, beneath slabs, near electrical equipment, or when shutoffs don’t hold. Licensed plumber leak repair encompasses diagnosis, access planning, repairs, and verification testing. Ask about the repair approach, components to be used, and the expected timeline; costs vary by access complexity, materials, and extent of damage. If your water heater failed, consider Water Heater Installation or water heater repair. For aging supply systems, a plumber may also recommend upgrades or Water Softener Installation – Hillsboro Plumber to reduce scale and stress on valves.
For sudden, large failures such as a burst pipe, turn off the main and drain lines by opening faucets from lowest to highest to reduce pressure. Emergency Burst Pipe Repair – Hillsboro Plumber and Leaks & Burst Pipes – Hillsboro Plumber address urgent failures with proper parts and post-repair testing.
7. Prevent the Next Leak: Maintenance, Pressure Control, and Smart Monitoring
Prevention is steady, simple work. Check under sinks monthly, feeling for dampness and watching for green or white crust on metal fittings. Replace brittle supply lines with braided stainless types. Keep toilet flappers and fill valves in good shape, and follow the manufacturer’s guidance to flush sediment from the water heater periodically—this can ease stress on tanks and valves. If the anode rod is depleted, schedule Anode Rod Replacement Water Heater – Hillsboro Plumber to help protect the tank’s interior.
Control water pressure so joints and valves aren’t overstressed. A pressure-reducing valve (PRV) can keep household pressure within a reasonable range; use a simple screw-on gauge at an exterior hose bib to check. If readings trend high, have a licensed plumber adjust or replace the PRV. In areas of Hillsboro with harder water, consider Water Softener Installation – Hillsboro Plumber to reduce scaling on fixtures and inside valves.
Smart tools provide early warnings. Place leak detectors under sinks, near the water heater, and behind the washer. Some systems connect to automatic shutoff valves that close the main when a sensor trips. Track your water bill and compare month to month; a steady rise without a lifestyle change can suggest a hidden problem. Keep a simple home log with occasional meter readings during quiet periods. Patterns will often reveal issues before they become serious.
Hillsboro Plumber works across Hillsboro every week helping homeowners, landlords, and businesses track and fix leaks quickly. Whether it’s a slow toilet fill, a hidden slab leak, or water damage from a failed hose, trained technicians can isolate the source and complete repairs with care.
Frequently Asked Questions
How do I tell if my toilet is leaking into the bowl?
Add dye to the tank and wait ten minutes without flushing. If color appears in the bowl, the flapper is not sealing properly. Also listen for a faint hiss or periodic refills. Replacing the flapper and cleaning the seat surface usually resolves it.
What should I do first when a pipe bursts?
Shut off the main water valve immediately. Open cold faucets to drain lines and reduce pressure. Turn off power to any wet area, move items away from water, and use towels or a wet/dry vacuum to contain spread. Then contact a licensed plumber to complete repairs and testing.
Who installs hot water heaters and handles permits?
A licensed plumber installs water heaters and manages code requirements. They size the unit correctly, connect venting and gas or electric safely, and test for leaks. If replacing an older unit, ask about Water Heater Installation – Hillsboro Plumber and whether code updates are needed in your area of Oregon.
How do I fix a small leaking pipe joint myself?
Turn off water, dry the area, and apply a temporary pipe repair clamp or epoxy putty designed for plumbing. These are short-term stabilizers to limit damage. Schedule a proper repair to replace the failed section.
How often should I check the anode rod in a water heater?
Follow the manufacturer’s guidance and consider periodic inspections as the heater ages. If water is hard or hot water has a sulfur-like odor, ask a plumber about anode rod replacement.
Key takeaways
- Confirm quickly with the meter test when all fixtures are off.
- Protect safety: shut water and power in wet zones before checking.
- Isolate with valves and timed tests to separate supply from drain issues.
- Call a licensed plumber for hidden, slab, or service-line leaks.
- Prevent repeats with steady maintenance, pressure control, and smart sensors.
Conclusion
Finding a leak is a method, not a guess. Start at the meter, move from easy checks to valve isolation, and read moisture patterns carefully. Hillsboro Plumber serves homes and businesses with leak detection, pipe repair, and water damage help. Contact us.
If you are not sure which of these you are dealing with, it is worth having someone look at it before it turns into a bigger job. Get in touch with Hillsboro Plumber today and we will tell you where you stand.